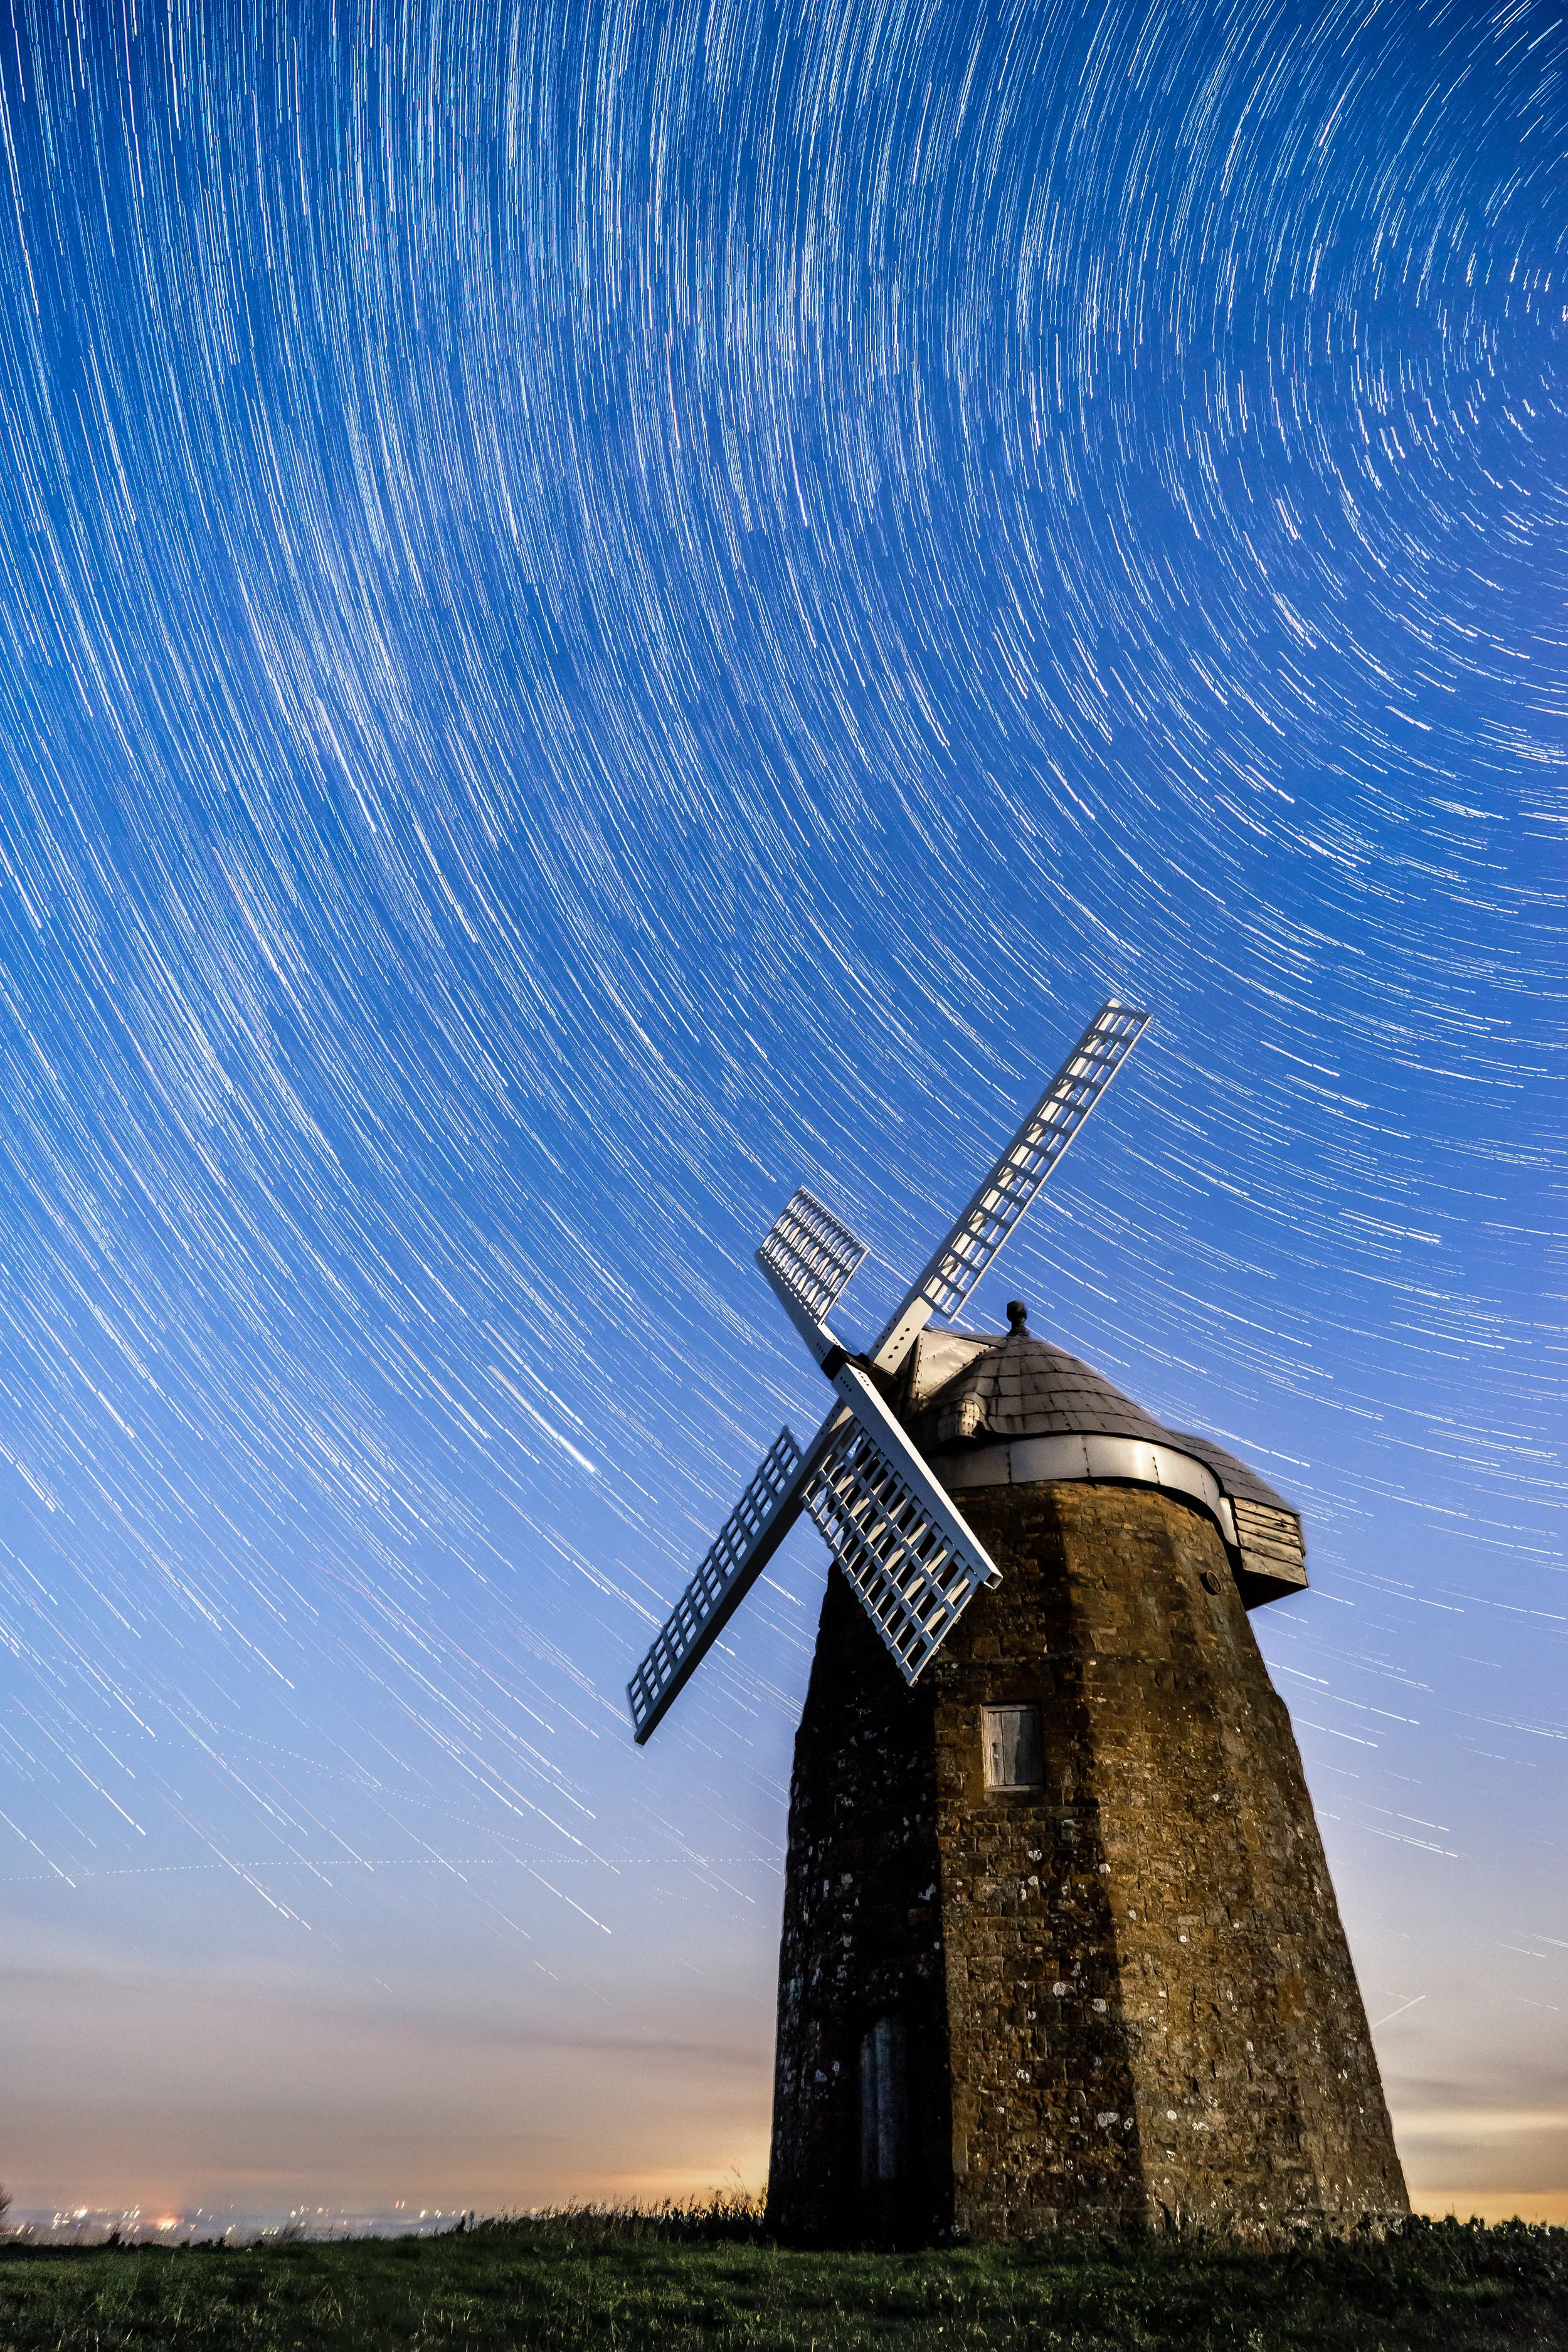
How I shot "Falling Stars"
When I upload a photo like the one below the main question I often get is “How did you do that” and the comment I get most is “You must have a really expensive camera”
The question, I’m happy to answer but the comment, is the most frustrating and I know i’m not the only photographer that hears this!
I’ll do my best to explain how I went about capturing the image and whats needed.
What’s needed:
A camera. Any camera that will allow you to shoot in RAW and have manual control over it’s settings such as Shutter Speed, Aperture and ISO. Not essential but good, would be a camera that excels in low light which will help reduce noise in the final image.
Fully charged batteries. Depending on the length of star trails you would like this could take anywhere from 30mins to a few hours.
A Tripod. Your camera will be in the same spot for at least an hour taking a number of exposures so it needs to be sturdy to minimise any kind of camera shake. This will ensure the final image is in focus.
A remote cable release. This will allow you start and stop the exposures without touching the camera. It will also allow you to lock the shutter button down, this means you can leave the camera to do it’s thing for the duration.
Warm clothing. Depending on where you are it can get pretty cold when your stood around outside in the middle of the night.
Location.
So to start off your going to want to find a location with some good foreground interest, in this case I found a lovely looking windmill that is accessible by foot. Ideal conditions would be clear sky, bright stars, no moon and away from any light pollution, this can’t always be the case. On this particular night the the moon was at 85% and the location is about 6 miles away from a very large town, it’ s almost a city I would say!
Composition.
When you arrive at the location it’s time to compose the image. I dial in a really high ISO and low aperture and about a 5 second exposure which means I can take photos quickly to see what composition works best. The photos will look terrible but there not needed anyway. I chose a composition where I could place the very large town behind me and where the moon would leak a little bit of light onto the foreground of my image.
Focusing.
Now it’s time to get focus. To do this you will want to be in manual focus mode, magnify your screen as much as you can on a visible star in the sky. This star, if out of focus should look like a big blurry white blob! all you need to do is keep turning that focus ring on your lens, until the star becomes a sharp white dot. Once focus is obtained then leave it as is.
Exposure Settings.
You can just use trial error to fond out what’s working best. My settings for this photo where:
Shutter Speed: 20 seconds
Aperture: F4
ISO: 1000
These settings gave me just enough light on the foreground for me to pull some detail out and also meant I didn't have to much light pollution, although I did end up with some on the horizon line. Remember, a high ISO will give you a lot of noise in the image, in this instance I would not have gone any higher. A longer shutter speed would also be ok if I wanted to reduce the ISO as I didn’t need sharp stars for star trails. My aperture of F4 allowed for the windmill to be in focus as well as the stars.
Start Shooting.
I set my camera to continuous shooting mode and locked it down. This means the camera will continue to take 20 second exposures for as long as the button is locked in place.
In the meantime.
I like to look up at the stars. Once your eyes have adjusted it’s amazing what you can see when you spend some time actually looking. I’ll sometimes take a hot flask with me for a hot chocolate, I’m probably the only man in the UK that does not drink Tea or Coffee! Snacks is always good. Other than that I’m normally shining my torch in any direction that I hear a rustle!
Post Processing.
There’s lots of ways to post process an image but here’s what I do for Star Trails.
I upload all my images into light room.
I edit one photograph to my desired look.
Check all the other images for any planes or undesired objects that might ruin the shot.
I then sync these settings across all the other photos.
They are then exported as jpegs.
Once exported I use some software that is free to download called StarStax
From there you basically drag and drop the images into the programme, select your desired settings and let it do it’s thing.
Once the image is done I’ll take it back into Lightroom for some very minor adjustments and that’s it. The image above is what I’m left with!
I hope you have found this useful, remember, this is how I do it, it can be done other ways, there’s lots of resources online to check out. If you have questions then just drop me a message and I’ll do my best to help you out.
Happy shooting!
Carl.
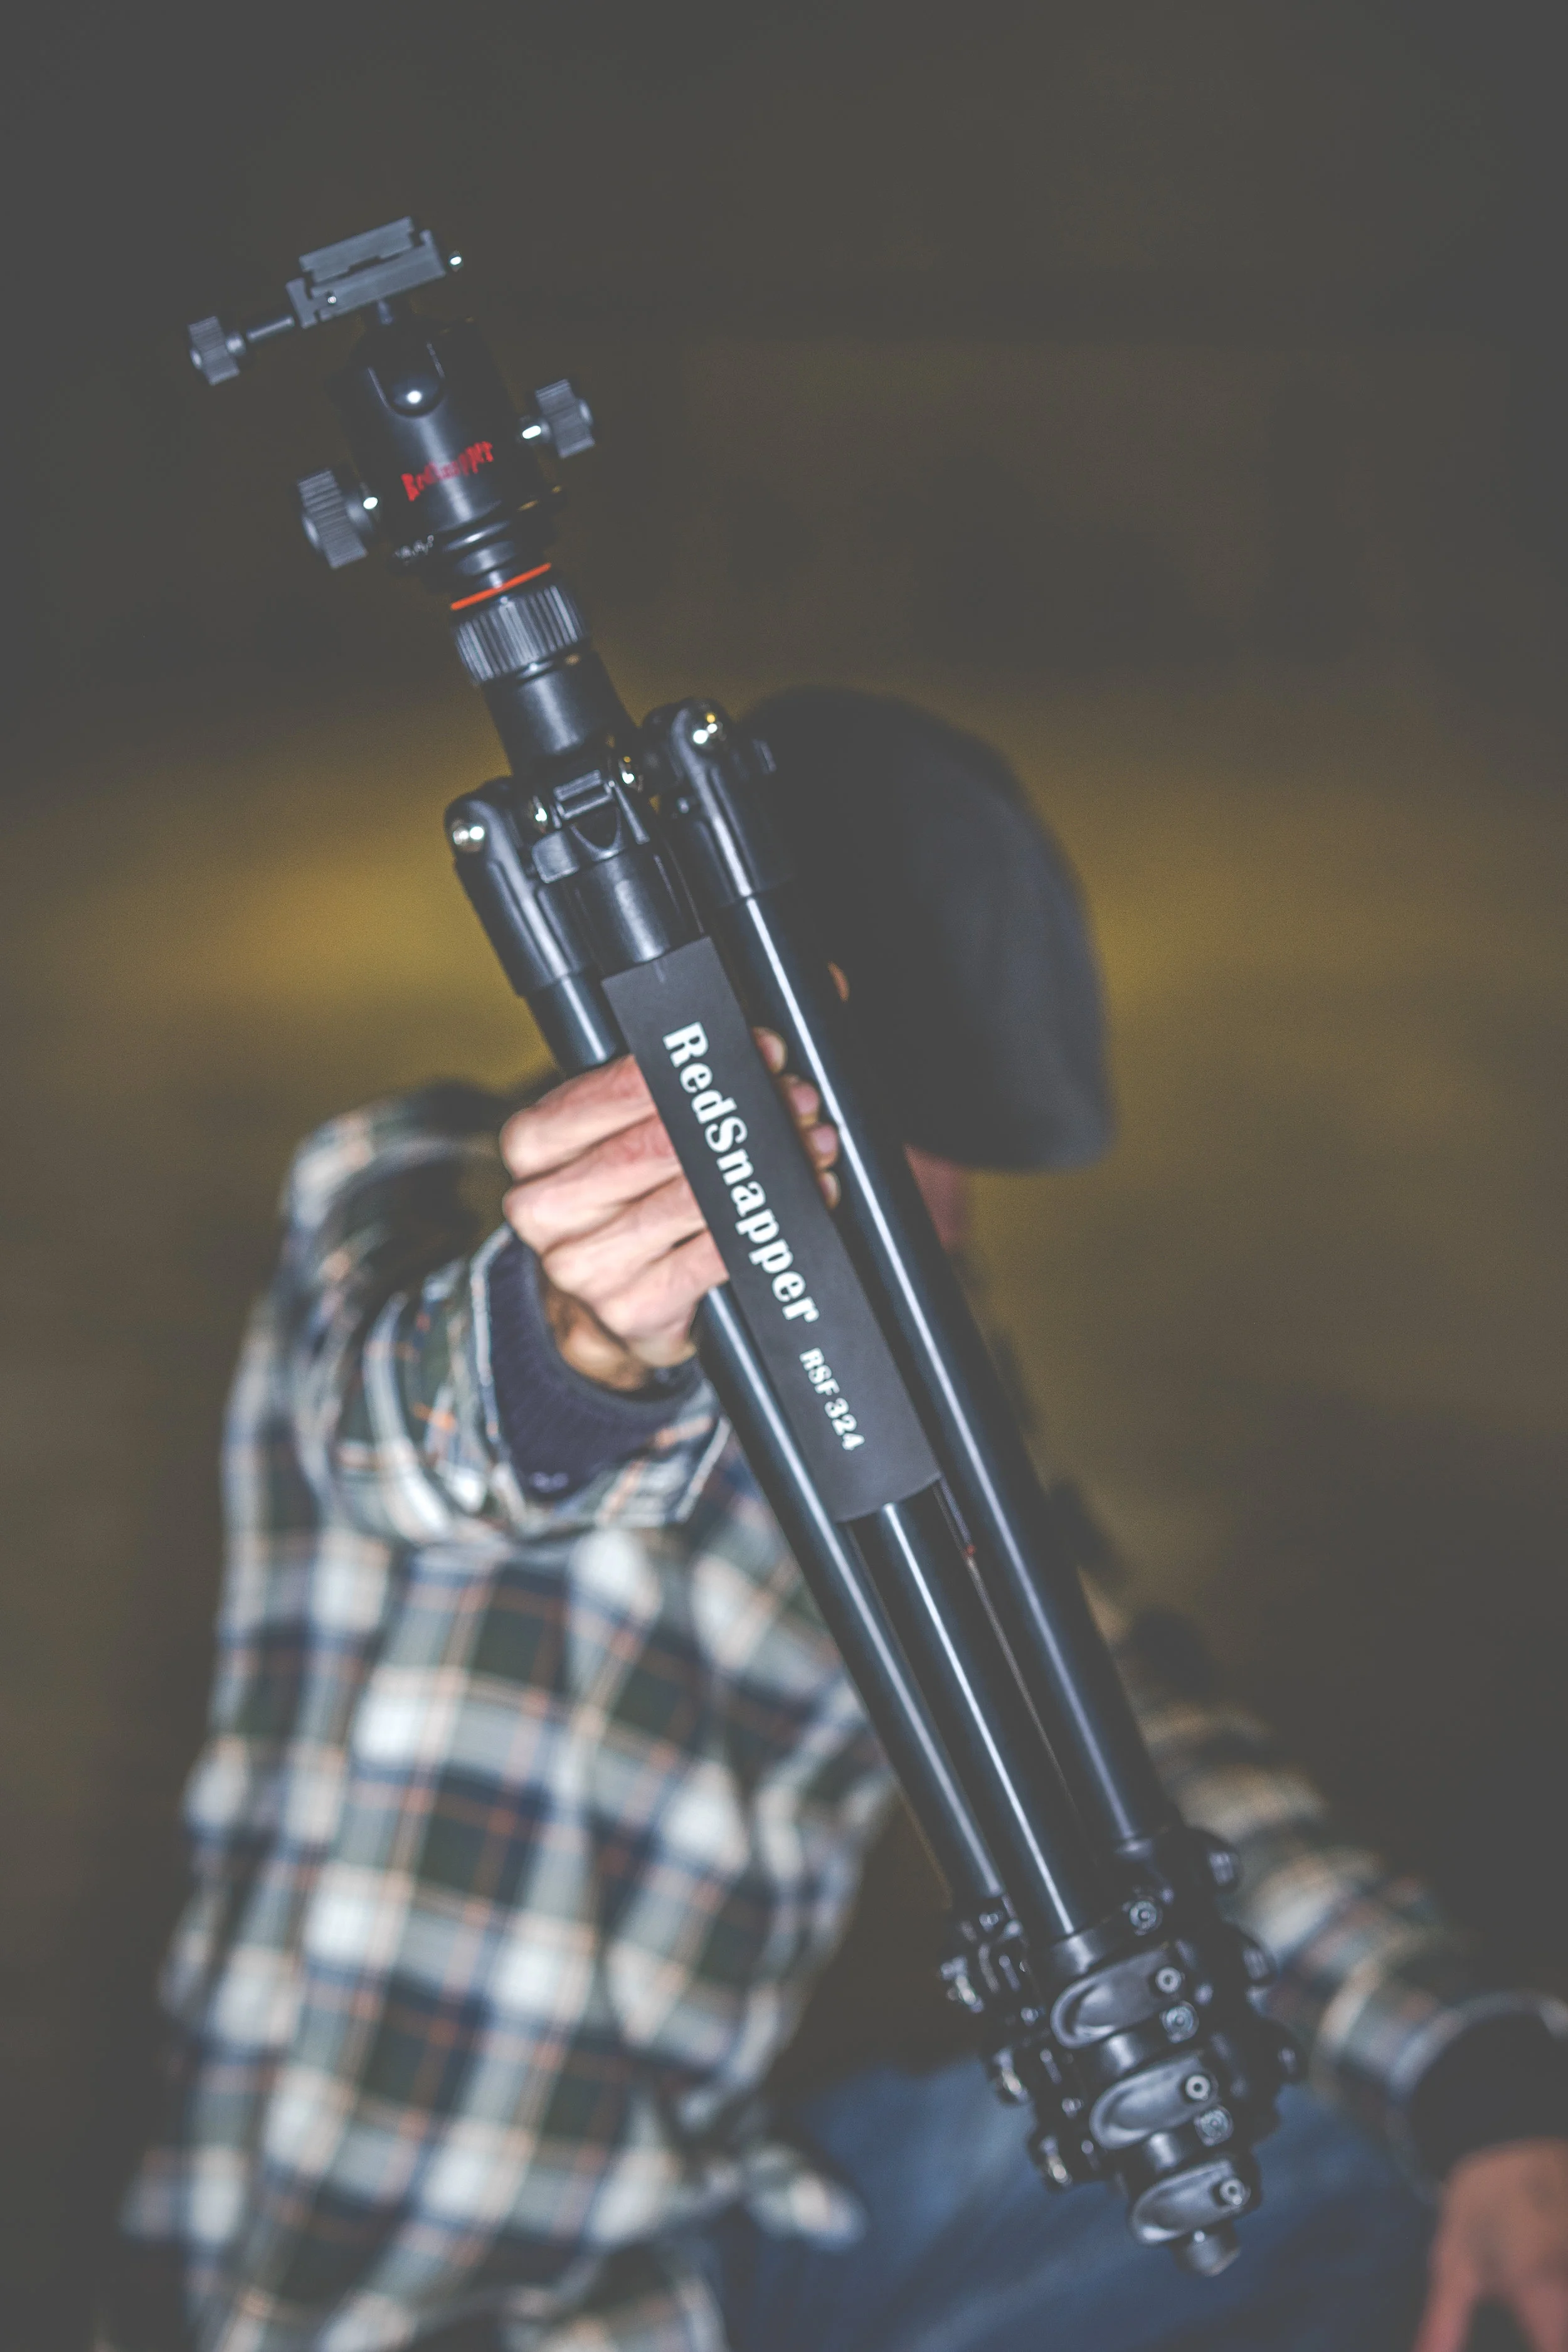
Being made a Brand Ambassador!
I Love Red Snapper! Iv’e been using an older model than the one pictured for the last 6 years, I didn’t have a great deal of money to spend as I was really just starting out in photography, a friend of mine recommended them as they were built well for a good price and local. He Wasn’t wrong! For a little over £100 at the time I couldn’t believe it, It felt heavy/sturdy, which I like, and as I’m tall I like a tripod that can extend to 6ft without the centre pole being extended and the whole thing blowing in the wind.
It served me well for a very long period of time while travelling, it went through so much that I’m surprised it’s not in the bin!
On my return back to the UK a clip had snapped on one of the legs, not a problem, I called in to see Joe of Red Snapper and he replaced the clip for me for free, this was 6 years after I purchased it! While there we got to talking about the product, I explained that I couldn’t believe how well built the tripod felt and how it had performed for the price!
Long story made shorter, I was made a Brand Ambassador and supplied with the RSF - 324 Tripod with the RSH - 12 ball head. This Tripod and head deal comes in at £159.95. I can honestly say it’s worth it! You can check out all the specs here.
Being an Ambassador for a brand I use, recommend to people, has great products, great customer service and are local is perfect, it makes complete sense!
If your interested in purchasing any products from them, be sure to use the CODE: CEP10 at checkout and you will get 10% off all Red Snapper branded products.
Cheers,
Carl.